Okay, first off, don’t follow me if you think this is a crafting blog. It’s not.
But I have been following the shenanigans of Bonnie Burton and Anne Wheaton and their #VandalEyes campaign for a while now, and I was jealous of the GINORMOUS googly eyes Bonnie had at San Diego Comic Con / w00tstock. Since I have enough trouble finding regular-sized googly eyes, I decided to start making my own.
My first project is a pair of wall clocks.
 (And yes, they really do work.) Here’s how I made them:
A) Things you will need:
-
Buy some cheap clocks. This is actually the hardest part. You are at the mercy of clock manufacturers and retailers as to what they want to make and sell to you. Garage sales, thrift stores and flea markets are also good but, unless you are into cyclops, they rarely have a matching pair. I found these at the Malwart for five bucks each.
-
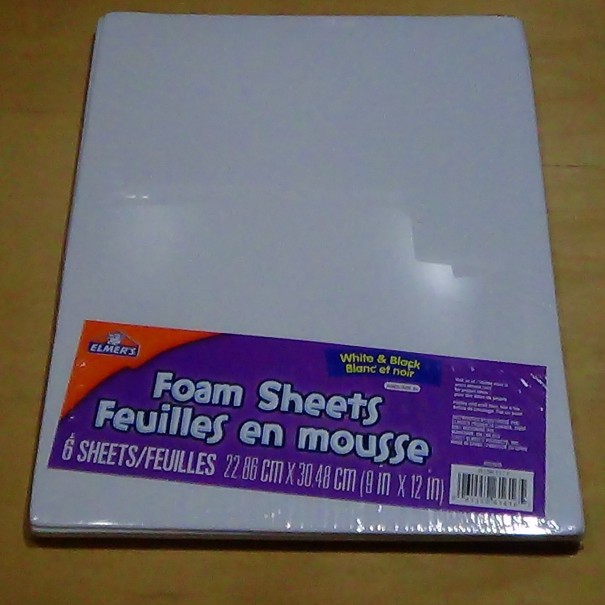
Buy some black and white foam sheets for a couple of bucks more. They should be at least as wide as the clock face. You could use construction paper but I find the foam has a glossier finish. Whatever you use it has to be light and stiff, and not bend under its own weight.
-
Other things you will need, but probably already have are glue or double-sided tape, scissors, a compass (the drawing kind, not the sailing kind), a screwdriver (not the drinking kind…okay, not just the drinking kind), a ruler (straight edge), and some kind of markers.
B) What to do with them:
-
Find a clean surface to work on. (Easy for you to say.)
-
Separate the clock mechanism from the housing. Exactly how you do that will depend on the kind of clock you have. If you are fortunate they are attached with screws like these are. Also common are snaps, which can be released with a little pressure in the right spots. Worst of all is glue, which means you’re going to have to break it to get it open. If that’s the case, try working an x-acto or razor blade around the edge to loosen it first. (I am not responsible for missing fingers or severed arteries.) Set aside the glass/plastic cover. (Note: don’t touch the glass with your finger and you won’t have to clean prints off before you put it back together. Also, keep screws and other small parts in a small bowl or other container so they don’t get lost.)
-
Remove the hands from shaft. (That sounds dirtier than it is.) The shaft consists of three different nested parts one for each hand. Using fingernails, scissors, or a small pair of pliers pull each hand straight away from the face in the following order: second hand (if any), minute, and hour. Try not to damage them; we will need them later.
-
Cut a piece of white foam to match the face of the clock. Because we’re doing googly eyes your clocks should be round. (Did I forget to mention that? Sorry.) Mark a spot near the center of the white foam sheet. Measure from the distance from the centre to the edge of the clock face and set your compass to match. If you can trace the face directly or you have something the same size, all the better. Trim around the edges. Remember you can always trim more, but you can’t put it back. Poke a hole through the centre large enough for the shaft to fit through. (It doesn’t have to be neat, it won’t be seen.)
-
If you want to use these as a clock mark in inconspicuous places the twelve, three, six, and nine positions.
-
Using glue or double-sided tape, attach the foam to the clock face. For extra neatness, or if you trimmed a little too much, you can chamfer around the edge with glue or caulk. Just make sure it dries white, not yellow or clear (or you can paint it with craft paint). Lay flat to dry.
-
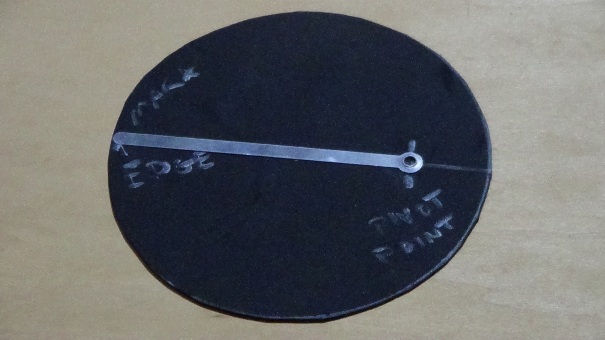
In a similar manner to the white felt circle, trace out a circle in the black felt. I’m tracing a CD-R here because, lets face it, what else are they good for now. Try to keep this as round as possible as the edges will be showing. It should be about 3/5ths the size of the white one. Do NOT punch a hole in the middle. Instead, on the side that will be facing away from you, draw a line across the diameter with a marker (that will show up on black, obviously). Where this line meets the edge, on one side make a small mark that will only be obvious on close inspection.
-
Place the longest hand from the clock, either the second or minute hand, along the line on the black disk with the outside end touching the edge of the circle where you previously marked. Mark the point where the hand would meet the shaft on the disk. We’ll call this the pivot point.
-
Now you have to make a choice as to which hand you want to use. I made two, one using the hour hand, and one using the minute hand. They don’t move fast enough to be distracting, and you can never be sure what position they will be when you look at them. Also, you can actually tell the time, if you think about it. However, they may not be accurate over long periods because the added weight may slow the clock. If you put them both on minute or hour hands they will slowly roll around in unison, for the most part. You could put them both on the second hands, but then your clocks will be rolling their eyes more often than a twelve-year-old girl on a road trip with her parents and little brother. Or you get a lava lamp effect, where you just want to stare at…them…all…day… The sad truth is the second hands cannot handle a lot of weight. So if you clock is large, the motor may not be strong enough to turn the pupils. And the motion on quartz clocks is not continuous; it’s a jerky lurch from one second to the next. Put the battery in and check before you go on. Better to stick with the minute and hour hands, in my opinion.
-
Whatever configuration you choose, the assembly is the same. Attach the hand along the line with the hole at the pivot point. I’m using tape electrical tape here because it was the first thing I found. Use whatever works for you. I recommend you leave about an inch from the pivot point so you can get underneath to attach it back on the shaft. If you use glue, let it dry before moving on. You can use the other hands to stiffen up the pupil so it doesn’t sag.
-
You guessed it! Attach the hand back on the shaft. It’s probably a little bent up so straighten it out until it looks good. Give the time set dial on the back a spin to make sure the pupil moves freely and is not rubbing anywhere. You should be able to see the marks you made on the pupil and the clock face. If you cant, fix it now. Line them up to set the time.
-
Make a quick check to be sure there are no loose bits of foam or tape. Reassemble the housing. Insert the battery.
-
Repeat.
There. Now you can call yourself an amateur horologist. (Again, not as dirty as it sounds.) Good luck, be crafty, and go Team VandalEyes. If you do make your own set, take a picture and post it to Twitter with the #VandalEyes hashtag or at vandaleyes.net. That would make me very happy.
Now, just how BIG can googly eyes get? I wonder…


Wait your not a crafting.blog? All these months!!!
In other news, that is bloody awesome!!! You’d check the time so often just to see a funny face.
To top it off, I’d personally add one of those electronic photo frames below with random smiles, frowns, poking tongues, whatever flipping through…
LikeLike
Okay, not just a crafting blog. I am full of silly ideas. And I like the bit about the frame.
LikeLike
I don’t know why I kept reading this. I couldn’t make one in a million years.
But I have made a few of those funny faces without the help of Malwart.
LikeLike
I’m sure you have other talents. Maybe I’ll post a cupcake recipe.
LikeLike
I am so going to do this in my classroom! It will go in the back of the room so I can smile whenever I see the googly eyes. Thank you for your wonderful project and your detailed instructions. (This from a girl who is not so crafty.)
LikeLike
Thanks for the comment and the follow. Good luck with your project.
LikeLike
I am probably going to ask my husband to do it. He loves to use exacto knives and compasses. =)
LikeLike
Another convert to the googly eyes army, perhaps?
LikeLike
For sure. They are done now (thanks, hubby). I will hang them up in my classroom and then take a picture to post. They are SOOO awesome!
LikeLike
I have a wall of clocks, that would be so awesome!
LikeLike
The dollar store is my new playground.
LikeLike
Reblogged this on Christopher De Voss and commented:
Hello Reblog Thursday fans! (If there is any.) I really, really, really, really want to make this! Really!
And I’m going to hang it over La La’s bed.
LikeLike